Arduino Mega 2560 Pro Project

I use a lot or Arduino processors in my contextual smart home. They are amazingly reliable and can be used to interface pretty much anything I want to my smart home. I have also used them as the basis of smart home locks, shower conrollers, smart curtains and other projects.

The focus of this project is to evaluate and integrate the Arduino Mega 2560 Pro into our contextual smart home, so that it becomes another one of our smart home building blocks. This is an 'embedded' version of the Mega 2560 and is much more compact. The Mega 2560 Pro is just 55mm × 38mm.
The objective is to create a very small, powerful, cheap, single board slave processor with Ethernet connection and lots of IO capability. The objectives are:
- Dallas 1-Wire support.
- 6 analogue inputs exposed via 4-way Molex connector.
- 8 digital IO pins exposed via 4-way Molex connector.
- 24 digital IO connections exposed via 3 10-Way DIL connectors.
- Ethernet connection and PoE support.
- I2C support exposed via a 4-way Molex connector.
Specifications
The Arduino Mega Pro (Embed) CH340G / ATmega2560 board is based on the ATmega2560 microcontroller and the USB-UART adapter CH340 and is compatible with Arduino Mega 2560, with identical functionality. The board has a micro USB connector to allow you to connect the microcontroller to the computer and to use the Arduino IDE.
The board can be powered directly through the Micro USB connector or via the Vin pin. The voltage regulator operates in a range of 6 to 9V DC. The maximum output current from the 5V on-board supply is 800mA and the 3.3V supply is also 800mA.The Mega Pro Embed CH340G / ATmega2560 board is based on the ATmega2560 microcontroller and the USB-UART adapter CH340. The board is compatible with Arduino Mega 2560.
These are covered in more detail on my Smartisant website.
Power
The board can be powered directly through the micro-USB connector, or via the Vin pin. An on-board voltage regulator typically accepts 7V to 9V dc but, will handle voltages as high as 18V dc. You can't use a 5.0V dc supply on the Vin pin because of the voltage drop across the regulators.
The maximum output current that can be drawn from the on-board 5V supply is 800mA and on 3.3V supply is also 800mA.

I typically use an adjustable dc-dc convertor to provide 5V into the 5V pin, bypassing the on-board voltage regulator. These accept a wide range of input voltages and are efficient and tiny (22mm × 17mm). They handle any voltage drops that might occur over longer power cable runs and typically I use a protected 12V dc power network around my smart home for my Arduino devices.

I'm using an on-board dc-dc converter to provide a 5.0V dc voltage to the Mega 2560 Pro via the 5V pin. This is also exposed via a 2-way Molex connector, to enable local power to be supplied when testing or when PoE is not required.
This board sits under the Funduino Ethernet module to save space.

The use of a fairly high power dc-dc converter means that a lot of other sensors, devices and peripherals can be powered from the one power supply. This increases the amount of current that can be drawn compared to the on-board Mega 2560 Pro voltage regulator. This allows use of things like my mains voltage relay board.
Networking

I currently using these devices with a Funduino W5100 Ethernet module.
- +5 = 5V dc power
- G = Ground
- SS = This is your 'chip select'. Usually it connects to D10 on the Arduino.
- R =This is your Reset pin. It should not be connected to your Arduino.
- MO = This connects to the MOSI pin of your Arduino.
- CK = This is the clock pin and connects to the SCK pin of your Arduino.
- MI = This connects to the MISO pin of your Arduino.
- G = Ground (another one).
- P+ = Power over Ethernet (PoE).
- P- = PoE- is connected to GND on the board.
Power Over Ethernet (PoE)
So if you want to use the PoE aspect of the Funduino the module, you need to inject power to the 7 and 8 pair of your Ethernet cable. Jumpers will be used to isolate the PoE lines between the Funduino module and an on-board dc-dc convertor.
I have developed my own custom PoE power injection PCB to support this.
PCB Design
This is a version of the Mega 2560 that is designed to be embedded. For this reason, I am designing a bespoke PCB onto which the Mega 2560 Pro can be mounted. The goal is to replicate the functionality of many of the other boards that I've designed and had manufactured into this one single PCB which is just 80mm × 95mm.

Before I could start my design for my PCB, I needed an Autodesk Eagle PCB library for the Mega 2560 Pro. Fortunately, RobotDyn have done this already.
Ethernet Shield

The first thing that will be replaced is the standard Arduino Ethernet shield. The Funduino module fits up-side down and over the dc-dc converter.
Smartisant Shield SHLD1

The second board functionality that will be replicated is that of the Smartisant Arduino Shield SHLD1, which is described in a lot more detail here.
This provides the RC network for improved reset, exposes analogue inputs A0 to A5 and a 10-Way DIL connector for pins D2 to D9. It also has space for a resistor to enable A0 to be used for Dallas 1-Wire and space for capacitors on the other analogue inputs.
Smartisant Mega 2560 Header Board HEAD1
The third board functionality to be replicated is that of the Smartisant Arduino header board. This exposes 24 digital IO pins via three 10-Way DIL connector. The first of these 10-Way DIL connector will be replaced, to directly expose the Smartisant 8-channel IO Board IO1 functionality. The other two 10-Way DIL connectors will remian though.
Smartisant IO Board IO1
The fourth board functionality to be replicated is that of the Smartisant 8-channel IO Board IO1. This exposes 8 digital IO pins via 4-way Molex connector.
Connectors
The following summarise the pins exposed via connectors:
- Digital pins 2 to 9 exposed via a 10-Way DIL connector.
- Analogue pins A0 to A5 exposed via 4-way Molex connector.
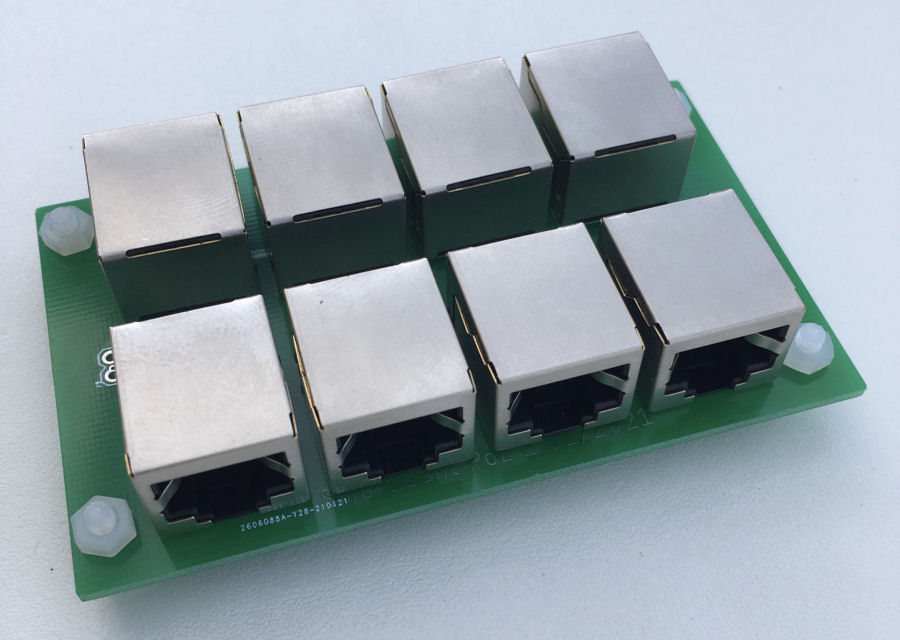
- Pins 22 to 29 exposed via eight 4-way Molex connectors.
- Pins 30 to 37 exposed via a 10-Way DIL connector.
- Pins 38 to 45 exposed via a 10-Way DIL connector.
Testing
Power
My first tests involved setting the output of the dc-dc converter to 8.0V dc and checking I could power the Arduino via an external power source. This all worked as expected.
Networking
The next test involved getting the networking working. This seemed to work fine as well :-)
Smart Home Integration
Over my many years doing smart home (I started in 2004), I have developed my own library of code for Arduino processors and this includes functions to integrate it into my distributed Home Control System and connect numerous types of sensors. These 'slave processors' can then do clever stuff like local control, self-monitoring of performance, local signal conditioning and rate limiting, send warnings and errors, or host some functions locally.
This maximises reuse across my many smart home projects, making it very quick and easy to develop and test new smart home capabilities. My smart home also employs the concepts of technology abstraction, meaning my smart home is also technology agnostic. This allows old technologies or broken sensors and devices to be swapped out with new ones, with minimal effort and zero reconfiguration.
Most of the Arduino processors installed in my smart home use an Ethernet IP network interface, to enable them to send and receive events with my Home Control System, using my unified communications protocol. Wired networks ensure very low latency and hence a great user experience, though occasionally I will use Wi-Fi.
Adding sensors and devices to my Home Control System is simply a matter of adding one line of JSON for each one, to the main configuration file. This defines the name, zone, object type and also the details of the slave processor it is hosted or controlled by. All the intelligence is within my Home Control System, which receives and sends encrypted events using my unified communications protocol. It sends events to update my smart home on things like the temperature, humidity, fan state, appliance and lighting state changes, occupancy, etc.
Summary
Most of this project is about the PCB design and this is progressing really well. I've tested the first prototype PCB back from manufacturing and I'm currently updating the design based on my testing. I'm also squeezing in some cool new features.


